
Providing the SP authorization details
After completing the prescreen evaluation, provide SP authorization request details on the Authorization Details page.
When the Authorization Details page opens, you will see the prescreen entries displayed as view only near the top.

If you need to edit something in the Prescreen section, you have to go back to the Prescreen page to enter the change. Select Back to Prescreen. After any change, prescreen runs again when you select Next to determine whether authorization is required.
Complete the authorization details fields in the rest of the Authorization Details page.
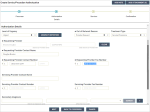
To provide authorization details:
1. From the Level of Urgency list, select the urgency level.
If Urgency Definition is available, select it to see your organization's guidance on choosing urgency levels.
Your organization may require an attestation (acknowledgement that the selection is in compliance with the urgency definition). If so, an attestation window will display. Select Yes to attest. If you select No, TruCare ProAuth will revert your selection to your organization's configured value or back to blank.
2. From the Out of Network Reason menu, select the reason for requesting a facility that is out of network.
3. From the Treatment Type menu, select the type of treatment being requested.
4. Specify the requesting provider using the following steps:
a. Enter a minimum of two non-wildcard characters in the Search by Provider name or Search by Provider NPI.
The requesting provider is the entity that is requesting/ordering the service or admission for a member.
By default searches include only providers associated with your user account. You may have the option to search all available providers by selecting Search All Providers. When using the Search All Providers option, use precise criteria to get the best search results; only 50 data entries are shown per search.
b. Select Search.
If the characters you enter have a unique match, the fields are filled in automatically and you can skip the next step. Do an advanced search, if necessary.
c. Select the provider from the list.
5. In the Requesting Provider Contact Name field, enter the contact name specified by the provider.
6. Enter the requesting provider contact number for the authorization, including the country code and extension, if any.
7. Enter the requesting provider fax number, including the country code.
8. In the Servicing Provider Contact Name field, enter the contact name specified by the provider.
9. Enter the servicing provider contact number for the authorization, including the country code and extension, if any.
10. Enter the servicing provider fax number, including the country code.
11. Specify a secondary diagnosis (or more than one) if needed, using the following steps:
a. Enter a minimum of two characters in the Search by Diagnosis name or Search by Code and select Search.
Use precise criteria to get the best search results; only 50 data entries are shown per search.
To refine your search, select Name contains or Name starts with, enter your new search term, then select Search.
If the characters you enter match a single record, the fields are filled in automatically and you can skip the next step.
b. Choose the correct record (diagnosis name, code, code set) in the search results, scrolling through the list if needed.
The code set includes the diagnosis coding schemes defined in TruCare.
If necessary, select Clear to start over.
You might see a message about a diagnosis code being expired. For more information about expired codes, see Expired diagnosis or procedure codes.
12. If you need to add a note or attachment, do so now.
See Adding notes and attachments to authorization requests for details.
If you try to submit the request without adding a required note or attachment, a message that a note or attachment is required appears on the screen.
13. If you need to add clinical criteria, do so now.
See Adding clinical criteria to authorization requests for details.
If you try to submit the request without adding required clinical criteria, messages that clinical criteria are required appear on the screen.
14. Select Next and you are moved to the Services page to review services.